 Pin It
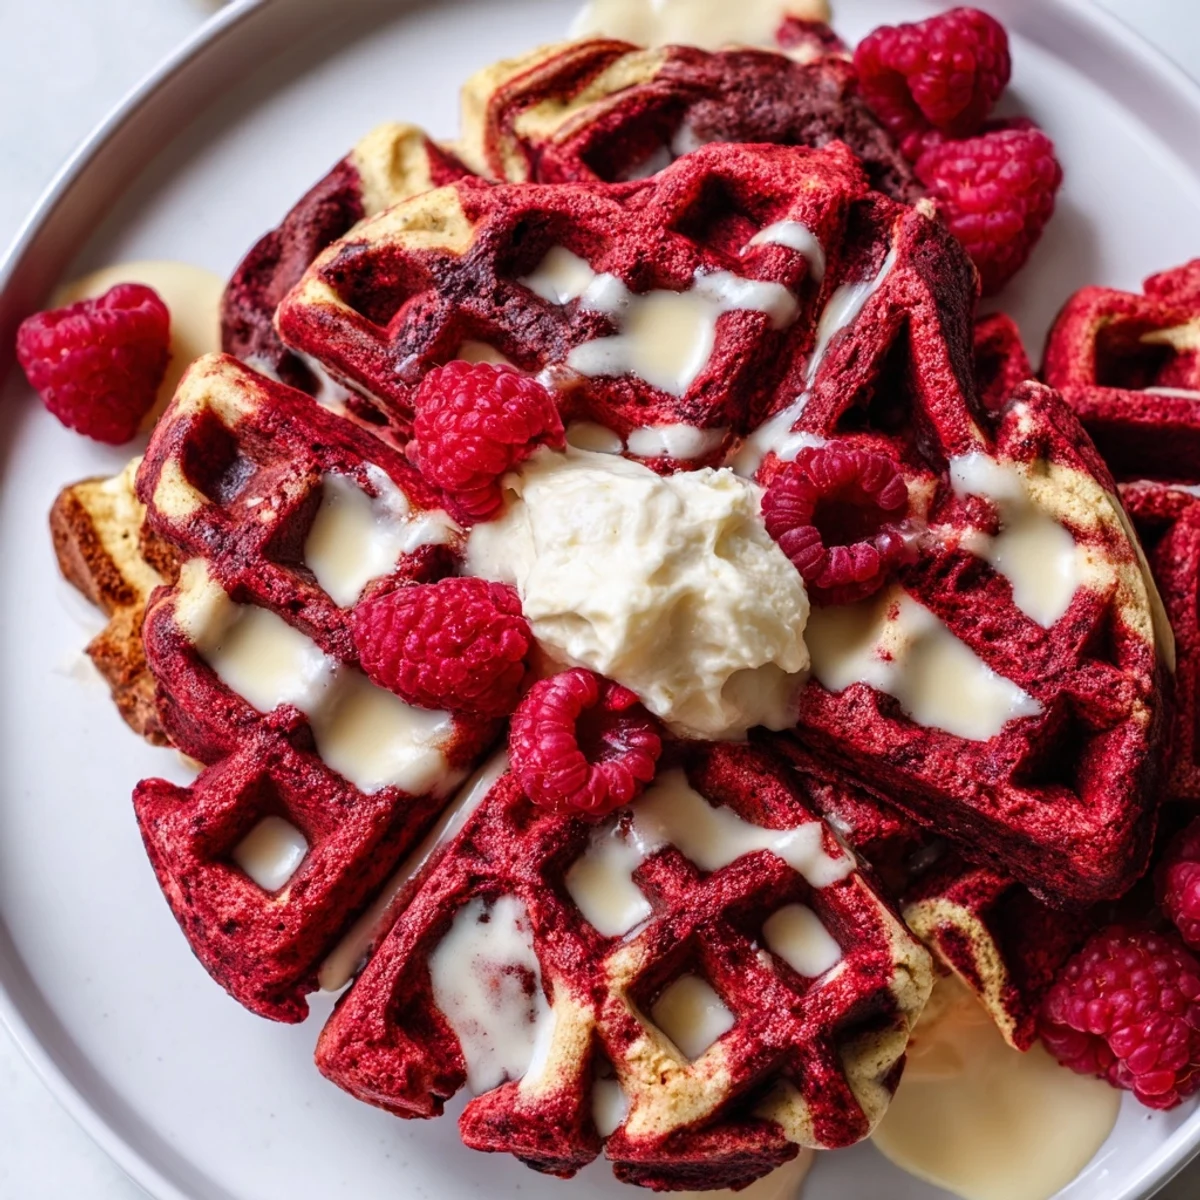
 Transform ordinary breakfast into something extraordinary with these stunning marbled waffles. The rich cocoa-red velvet batter creates gorgeous patterns against the classic vanilla base, resulting in waffles that are as beautiful as they are delicious. Each crisp, golden waffle delivers the signature subtle chocolate flavor and tender crumb that red velvet is famous for, perfectly balanced by the light vanilla undertones.
The technique is simple yet impressive: prepare one batch of vanilla batter, then divide and transform half with cocoa powder and red food coloring. Alternating spoonfuls of each batter create the signature marble pattern when gently swirled on the hot iron. The result is restaurant-worthy presentation that takes just 30 minutes from start to finish.
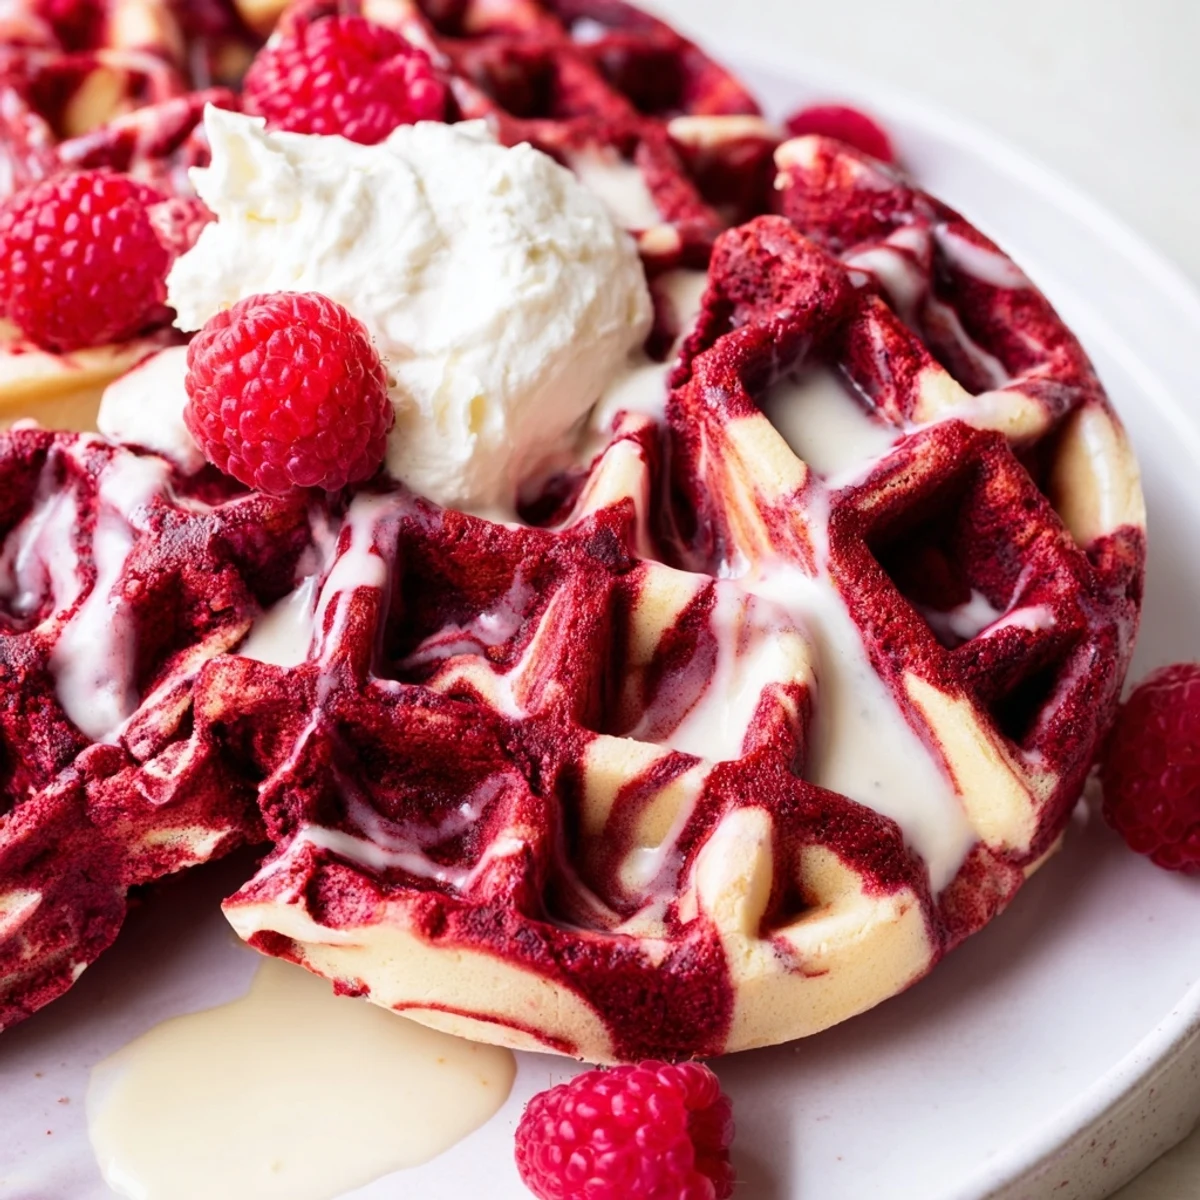
These waffles are naturally suited for special occasions—Valentine's Day breakfast, holiday brunch, or birthday celebrations. Top them with cream cheese glaze for the classic red velvet pairing, or go traditional with maple syrup and fresh berries. They reheat beautifully, making them perfect for meal prep or feeding a hungry crowd.
The first time I made these was actually by accident. I'd intended to make classic red velvet waffles but ran out of cocoa powder halfway through, leaving me with half a bowl of vanilla batter. Rather than waste it, I poured both onto the waffle iron in alternating spoonfuls, and when I lifted the lid, that swirling marble pattern stopped me in my tracks. Now it's the only way I make them.
My sister was visiting that weekend, and she took one look at the waffle plate and asked if I'd secretly taken up pastry classes. We ate them on the back porch with way too much cream cheese glaze, watching the morning fog lift off the mountains, and she made me promise to write down exactly what I'd done before she left.
Ingredients
- 2 cups all-purpose flour: The foundation that gives these waffles their crisp exterior and tender crumb
- 2 tbsp granulated sugar: Just enough to balance the tanginess of buttermilk without making them overly sweet
- 2 tsp baking powder: Ensures each waffle rises tall and fluffy in the iron
- 1/2 tsp baking soda: Works with the buttermilk to create extra lift and that signature velvet texture
- 1/4 tsp salt: Enhances all the flavors and prevents the waffles from tasting flat
- 1 3/4 cups buttermilk, room temperature: The secret ingredient that adds tang and tenderness, plus it activates the baking soda
- 2 large eggs: Structure and richness that help the waffles hold together when sliced
- 4 tbsp unsalted butter, melted and slightly cooled: Adds flavor and helps create that golden crunch we all want
- 1 tsp vanilla extract: Pure vanilla makes the plain batter sing against the chocolate swirl
- 2 tbsp unsweetened cocoa powder: Just enough cocoa to deepen the red color without turning it into chocolate waffles
- 1 tbsp red food coloring: Liquid or gel both work, though gel gives a more intense red with less liquid
Instructions
- Whisk the dry foundation:
- In a large bowl, combine flour, sugar, baking powder, baking soda, and salt until everything is evenly distributed
- Blend the wet mixture:
- In another bowl, whisk buttermilk, eggs, melted butter, and vanilla extract until the mixture is completely smooth
- Combine gently:
- Fold the wet ingredients into the dry ones just until combined, some small lumps are perfectly fine
- Create the divide:
- Split the batter evenly between two bowls, then whisk cocoa powder and red food coloring into one bowl
- Heat your iron:
- Preheat the waffle iron and give it a light coating of oil or nonstick spray
- Marble magic:
- Drop alternating spoonfuls of red and vanilla batters onto the hot iron, then gently swirl with a chopstick or knife
- Cook to perfection:
- Close the lid and cook for 3 to 5 minutes until the waffles are golden and crisp
- Serve immediately:
- Plate them warm with whatever toppings make your heart happy
 Pin It
 These became my go-to for birthdays after my niece declared them prettier than cake. Now every February, when winter feels endless, I make a double batch and invite friends over for what we call color therapy brunch.
The Art of the Swirl
I've learned that the marble effect is actually harder to mess up than you'd think. The key is dolloping the batters randomly rather than in careful patterns, then making just one or two figure eight motions through both colors. Overthinking it is what makes it look forced, whereas a haphazard approach creates those beautiful organic veins.
Buttermilk Secrets
Whenever I'm out of buttermilk, I measure regular milk and add a tablespoon of white vinegar, then let it sit for five minutes while I gather my other ingredients. The acidity is what matters for both flavor and chemistry, and this kitchen hack has saved me more weekend mornings than I care to admit.
Topping Combinations That Work
The cream cheese glaze is classic for a reason, but sometimes I switch it up depending on what's in season or who's at my table.
- Warm maple syrup with a pat of melting butter never fails
- Fresh berries and a dusting of powdered sugar feel lighter
- Whipped cream and chocolate shavings for full blown decadence
 Pin It
 There's something joyful about cutting into that first waffle and seeing the pattern you created, like opening a little present you made yourself. Hope these bring some color to your morning too.
Recipe FAQs
- → What creates the marble effect in these waffles?
-
The marble pattern comes from alternating spoonfuls of red velvet and vanilla batters on the waffle iron, then gently swirling them together with a chopstick or knife before cooking. This creates the beautiful swirling pattern throughout each waffle.
- → Can I make the batter ahead of time?
-
For best results, make the batter fresh. The leavening agents start working immediately when wet ingredients are added, so the batter is most effective within 30 minutes. You can whisk dry ingredients together the night before to save time.
- → What's the best way to achieve vibrant red color?
-
Gel food coloring typically produces more vibrant red shades with less liquid than liquid coloring. Start with one tablespoon and add more if needed for deeper color. The cocoa powder naturally deepens the red tone.
- → Can I freeze these waffles?
-
Absolutely. Let cooked waffles cool completely, then freeze in a single layer before transferring to a freezer bag. They'll keep for up to 3 months. Reheat in a toaster or oven at 350°F for 5-7 minutes to restore crispiness.
- → What if I don't have buttermilk?
-
You can substitute an equal amount of regular milk mixed with 1 tablespoon of lemon juice or vinegar—let it sit for 5 minutes to thicken. Greek yogurt thinned with a splash of milk also works well and adds protein.
- → Why do my waffles turn out soft instead of crisp?
-
Ensure your waffle iron is fully preheated before adding batter. Don't open the iron too early—wait until steam stops escaping, usually 3-5 minutes. Placing cooked waffles on a wire rack rather than stacking them helps maintain crispiness.