 Pin It
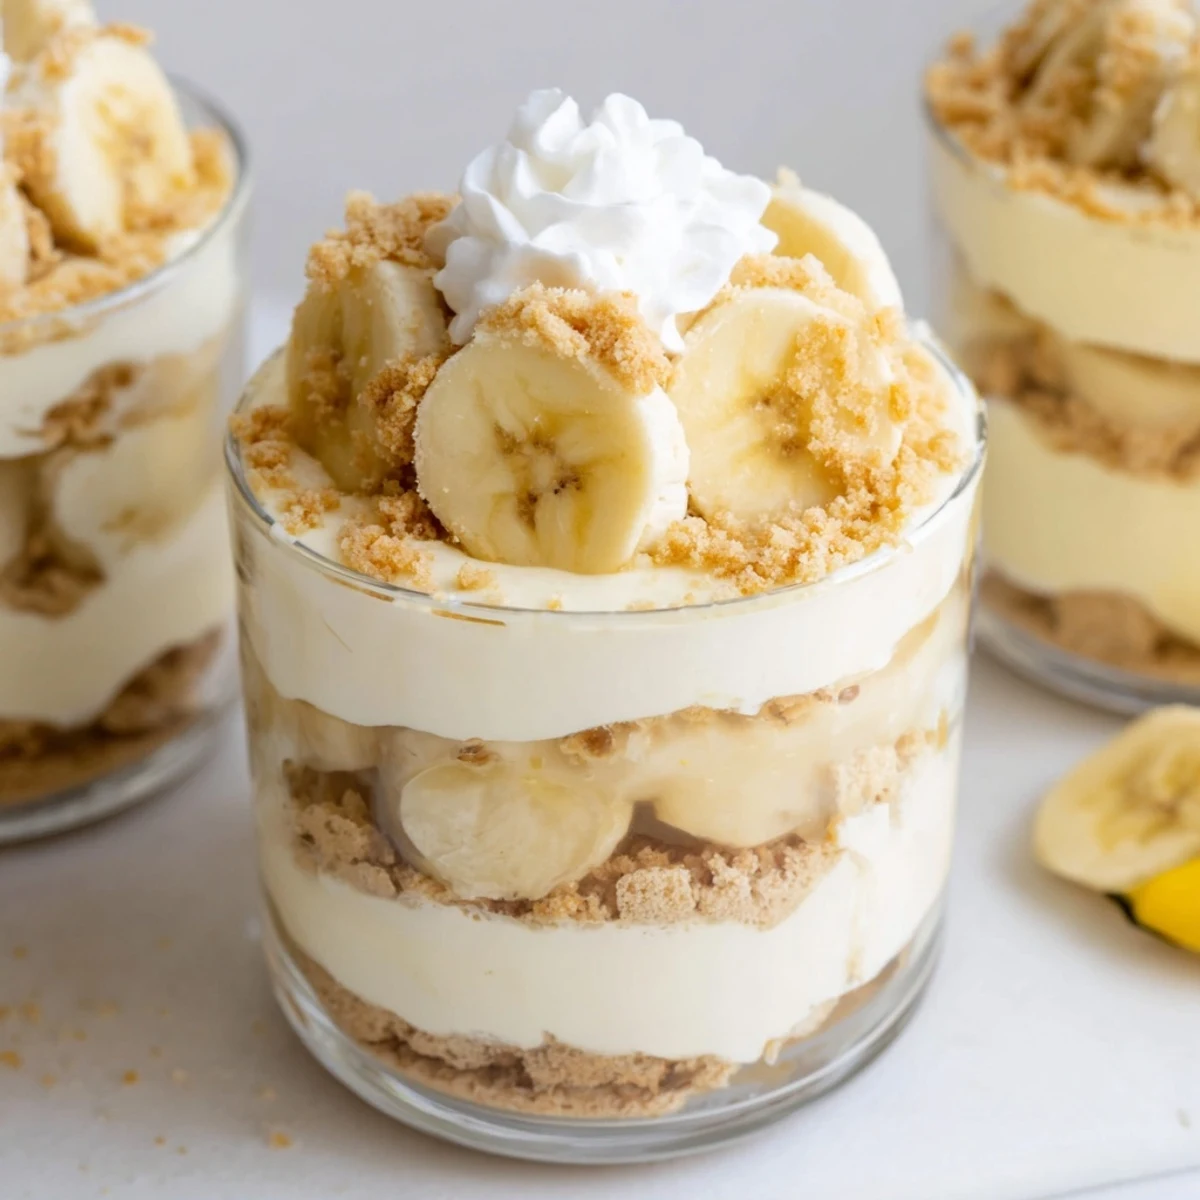
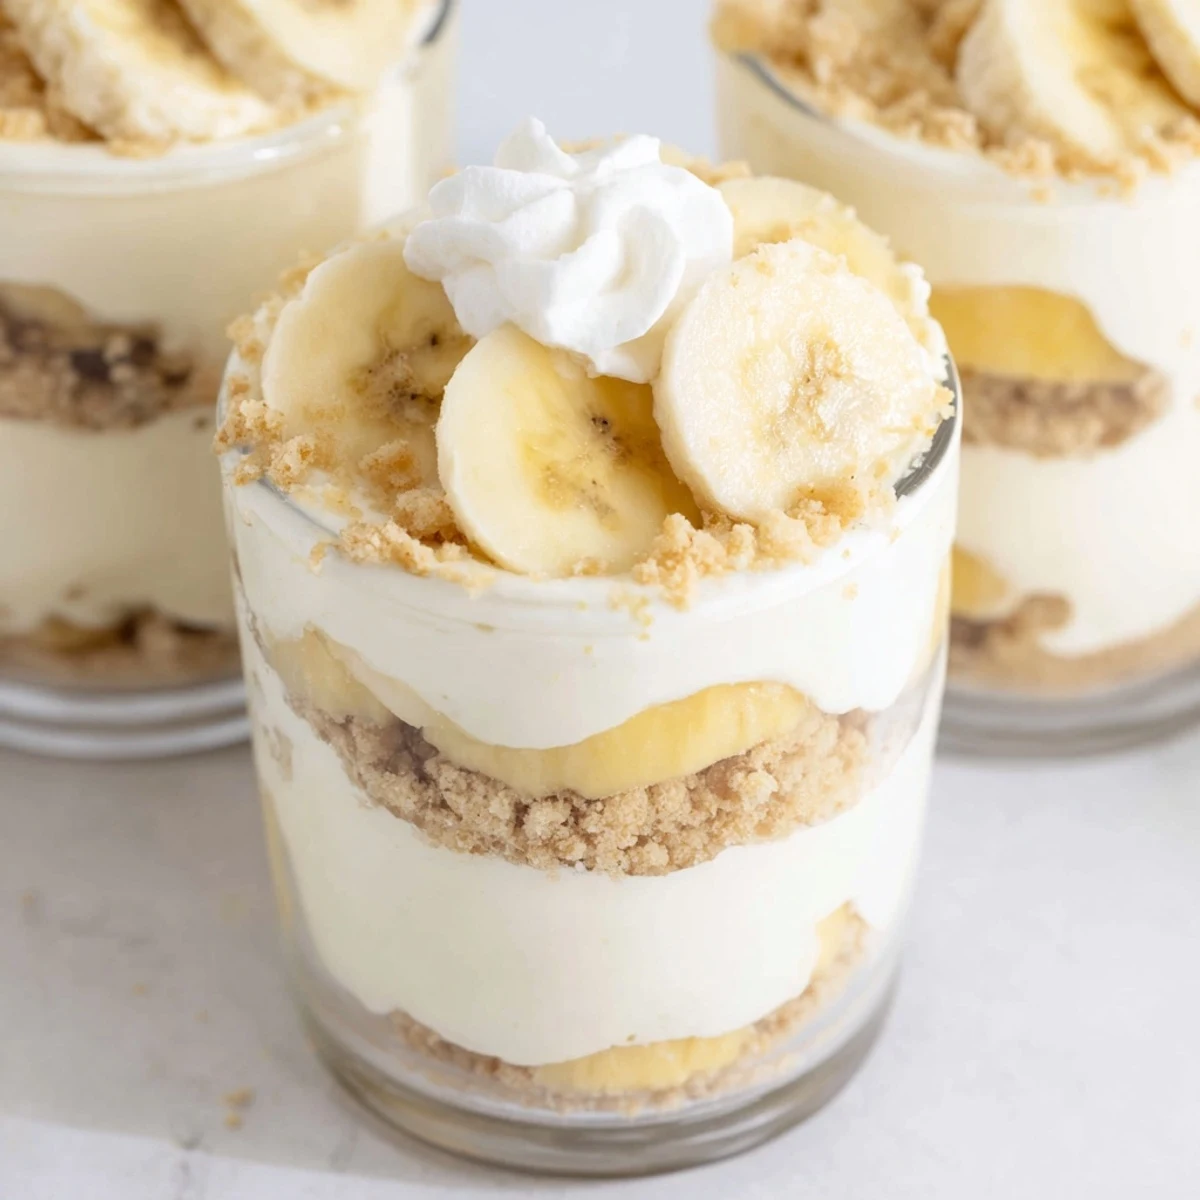
 These elegant individual desserts combine the best of two classic treats—rich cheesecake and nostalgic banana pudding—layered in portable cups. The buttery vanilla wafer crust provides a satisfying crunch, while the creamy cheesecake filling offers tangy contrast to the sweet banana pudding layer. Fresh banana slices and additional wafer crumbs add texture and visual appeal. Perfect for entertaining, these cups require no baking and can be prepared up to 24 hours in advance, making them an ideal choice for stress-free hosting.
Last summer my cousin asked me to bring dessert to a backyard barbecue, but it was ninety degrees and I refused to turn on my oven. These little cups happened almost by accident—I had leftover vanilla wafers from making banana pudding earlier in the week, plus a block of cream cheese that needed using. Now they're the most requested dessert at every family gathering.
I made these for my daughter's birthday party last year and the kids went absolutely wild. One of her friends told me she wanted to eat them every single day, which I took as the highest compliment possible from a seven year old. The adults kept sneaking back to the fridge for seconds too.
Ingredients
- 1 cup vanilla wafer cookies, crushed: The classic Nilla wafers work perfectly here—crush them in a ziplock bag with a rolling pin for the most satisfying stress relief
- 2 tbsp unsalted butter, melted: Use real butter here since it helps the crust hold together better than anything else I've tried
- 8 oz (225 g) cream cheese, softened: Leave it on the counter for at least an hour so you avoid those frustrating little lumps in your filling
- 1/3 cup granulated sugar: This amount balances the sweetness from the pudding without making the cheesecake layer cloying
- 1 tsp pure vanilla extract: Don't skip this—vanilla makes everything taste more expensive and homemade
- 1 cup heavy whipping cream, cold: The cream must be properly cold to whip up fluffy and light
- 1 (3.4 oz/96 g) package instant banana pudding mix: I've tried making homemade pudding but the instant version actually works better here for stability
- 1 1/4 cups cold whole milk: Cold milk is essential for the pudding to set up properly
- 2 ripe bananas, sliced: Look for bananas with some brown spots—they're sweeter and have more banana flavor
- Additional vanilla wafer crumbs, fresh banana slices, and whipped cream: These toppings make each cup look like something from a bakery window
Instructions
- Build the buttery crust:
- Combine crushed vanilla wafers and melted butter in a small bowl until every crumb looks coated. Spoon about two tablespoons into the bottom of each serving cup and press down gently with the back of a spoon to create an even layer.
- Whip up the cheesecake base:
- Beat cream cheese, sugar, and vanilla extract in a medium bowl with a hand mixer until completely smooth with no lumps remaining. This takes about two minutes of patience.
- Add the cloud factor:
- Whip the cold heavy cream in a separate bowl until stiff peaks form. Fold the whipped cream gently into the cream cheese mixture until fully combined—this makes the filling impossibly light.
- Make the pudding layer:
- Whisk together the banana pudding mix and cold milk in another bowl for exactly two minutes. You'll see it thicken right before your eyes like kitchen magic.
- Start the layering process:
- Spoon half the cheesecake filling over the crust in each cup. Top with a layer of sliced banana pieces, then divide the banana pudding evenly among all the cups.
- Finish with the final touches:
- Add the remaining cheesecake mixture on top of each pudding layer. Sprinkle generously with extra wafer crumbs and add fresh banana slices and a dollop of whipped cream if you're feeling fancy.
- Let them chill completely:
- Cover the cups and refrigerate for at least two hours before serving. This step is crucial—the flavors need time to become friends.
 Pin It
 My grandmother said these reminded her of the banana cream pie she used to make for Sunday dinners, but easier and somehow more elegant. Sometimes the simplest desserts carry the most memories.
Make-Ahead Magic
You can assemble these cups up to twenty-four hours in advance. Just wait to add the fresh banana slices and final wafer crumb topping until right before serving. The cheesecake and pudding layers stay perfectly fresh in the refrigerator.
Serving Suggestions
Clear glass cups show off those beautiful layers and make these feel like something special from a restaurant. I use whatever small glasses I have—martini glasses, mason jars, even fancy wine glasses work beautifully.
Mix It Up
Try crushing graham crackers or Nilla wafers for the crust if you want different flavor vibes. A sprinkle of cinnamon in the crust mixture adds a warm note that's especially nice in colder months. You could also swap vanilla wafers for chessmen cookies or even shortbread for a more sophisticated crunch.
- Drizzle a little caramel sauce over the top for an extra special finish
- Try using chocolate instant pudding instead of banana for a chocolate banana variation
- A crushed vanilla wafer rim on the glasses makes these look truly impressive
 Pin It
 Watch how quickly these disappear at your next gathering. Someone always asks for the recipe before they've even finished their first cup.
Recipe FAQs
- → Can I make these cups ahead of time?
-
Yes, you can prepare these cups up to 24 hours in advance. Store them covered in the refrigerator, but add fresh banana slices and whipped cream topping just before serving to prevent browning and maintain texture.
- → How do I prevent banana slices from turning brown?
-
Toss banana slices lightly in lemon juice before layering them into the cups. The citrus creates a protective barrier that slows oxidation. Alternatively, add the banana topping immediately before serving for the freshest appearance.
- → Can I use homemade pudding instead of instant mix?
-
Absolutely. Prepare homemade vanilla or banana pudding using your preferred recipe, then allow it to cool completely before layering. The homemade version may have a slightly softer texture, so chill thoroughly before serving.
- → What type of cups work best for these desserts?
-
Clear glass cups, mason jars, or parfait glasses work beautifully as they showcase the distinct layers. Each serving should hold about 6-8 ounces. Wine glasses or small dessert bowls also make elegant serving vessels.
- → Can I make this dessert gluten-free?
-
Yes, substitute the vanilla wafer crust with gluten-free vanilla cookies or crushed gluten-free graham crackers. Ensure the banana pudding mix is certified gluten-free, as some varieties contain wheat-based thickeners.
- → How long should I chill the cups before serving?
-
Refrigerate the assembled cups for at least 2 hours to allow the layers to set properly. For the best texture and flavor, chill for 2-4 hours. The flavors continue to develop, so they taste even better after several hours in the refrigerator.