 Pin It
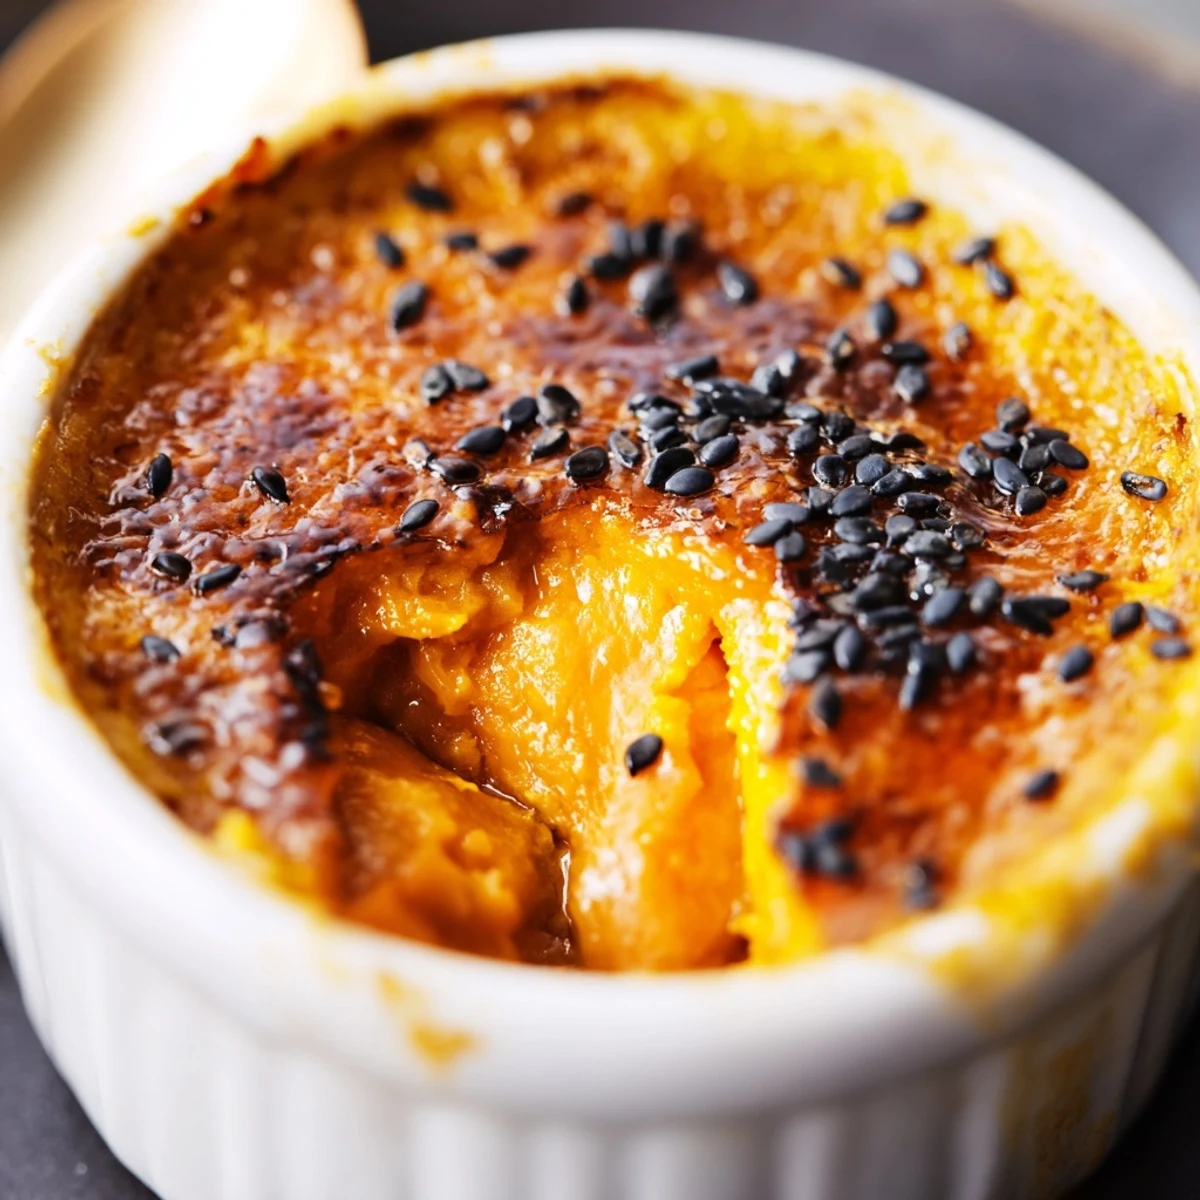
 This elegant fusion dessert marries the velvety smoothness of traditional French custard with the naturally sweet, earthy notes of Japanese sweet potato. The result is a beautifully balanced treat with a vibrant golden hue and rich, creamy texture that sets it apart from classic versions. The silky base gets its distinctive character from roasted sweet potato blended seamlessly with cream and milk, then baked until just set. The signature crackling caramelized sugar crown provides the perfect textural contrast—crisp and glassy against the lush custard beneath.
What makes this version special is how the sweet potato's natural sweetness and subtle nuttiness enhance without overpowering the delicate custard. The preparation involves creating an exceptionally smooth sweet potato cream base, combining it with a traditional egg yolk mixture, then gently baking in a water bath for that signature silky consistency. After chilling to develop flavors, each serving gets finished with a torched sugar layer that creates the beloved caramelized crust.
Perfect for dinner parties or special occasions, this dessert offers a sophisticated twist on a beloved classic. The natural sweetness from the sweet potato means less added sugar is needed, while the vibrant color creates stunning presentation. Serve chilled with the freshly caramelized top for the ultimate contrast of temperatures and textures.
The first time I made this, I was honestly just trying to use up some Japanese sweet potatoes that had been sitting on my counter for days. My husband walked into the kitchen while I was pureeing them with cream, looking completely confused, until I explained what I was attempting. He's now the one who requests this dessert for dinner parties, and he's not even a sweet potato person.
I served these at our autumn dinner party last year, right at peak sweet potato season. Everyone kept guessing there was pumpkin or some exotic spice involved. When I told them it was just the natural sweetness of Japanese sweet potatoes doing all the heavy lifting, they couldnt believe it. The earthiness balances the rich custard in a way traditional crème brûlée never could.
Ingredients
- 1 large Japanese sweet potato: These have a naturally sweeter, more nuanced flavor than orange sweet potatoes, and they puree into the most gorgeous pale yellow custard
- 1 cup heavy cream: Do not even think about substituting this—the fat content is what gives you that restaurant quality texture
- 1/2 cup whole milk: Lightens things up just enough so the custard isnt overwhelmingly rich
- 4 large egg yolks: Room temperature eggs incorporate so much better into the warm sweet potato mixture
- 1/4 cup granulated sugar: This is just enough to enhance the sweet potatoes natural sweetness without making it cloying
- 1/4 teaspoon vanilla extract: A little background warmth that ties everything together beautifully
- Pinch of salt: Absolutely essential for making all the flavors pop
- 3–4 tablespoons granulated sugar: For that glorious crackly caramelized top
Instructions
- Get your oven and water bath ready:
- Preheat your oven to 150°C (300°F) and put a kettle of water on to boil—having everything prepped ahead makes the assembly so much less stressful
- Cook your sweet potatoes:
- Steam or boil the cubed sweet potato until completely tender, about 15 minutes, then drain and let them cool just enough that they won't cook your eggs when you mix everything together
- Make the smoothest puree:
- Blend the cooked sweet potato with the heavy cream and whole milk until absolutely silky—any lumps here will show up in your final custard
- Whisk your yolks:
- In a separate bowl, whisk together your egg yolks, sugar, vanilla, and salt until they're pale and slightly thickened
- Combine everything gently:
- Slowly pour your sweet potato cream mixture into the yolks while whisking constantly—taking your time here prevents scrambled eggs
- Strain for perfection:
- Push the mixture through a fine mesh sieve into a clean bowl, pressing down to extract all the liquid and leaving any lumps behind
- Fill your ramekins:
- Divide the custard evenly among 4 ramekins and arrange them in a deep baking pan, leaving enough space between them for the water bath
- Create the water bath:
- Carefully pour the hot water into your baking pan until it reaches halfway up the sides of the ramekins—this gentle heat prevents curdling
- Bake until just set:
- Bake for 30–35 minutes until the custard is set but still has a slight wobble in the center, like pudding, which means it will be perfectly creamy once chilled
- Chill thoroughly:
- Cool the ramekins to room temperature, then refrigerate for at least 2 hours—overnight is even better for the texture to fully develop
- Create the caramelized crust:
- Sprinkle 1 tablespoon of sugar over each chilled custard and use your kitchen torch to caramelize until golden and crisp, working in circles to get even coverage
- Let it set:
- Wait about 3 minutes before serving so that caramelized sugar can harden into that perfect crackly shell we all love
 Pin It
 My mother in law took one bite of this and declared it the best dessert she's had in years. She's not someone who hands out compliments lightly, so that was quite a moment. The way her eyes lit up when she cracked through that caramelized top? That's why I bother with the extra steps.
Making It Ahead
The custards actually improve after a night in the refrigerator—the flavors meld together and the texture becomes even more luxurious. Just wait to add the sugar topping and torch them right before serving, otherwise that caramel will soften and lose its magic. I've made these a full day ahead for dinner parties and they've been perfect every time.
Getting The Perfect Brûlée
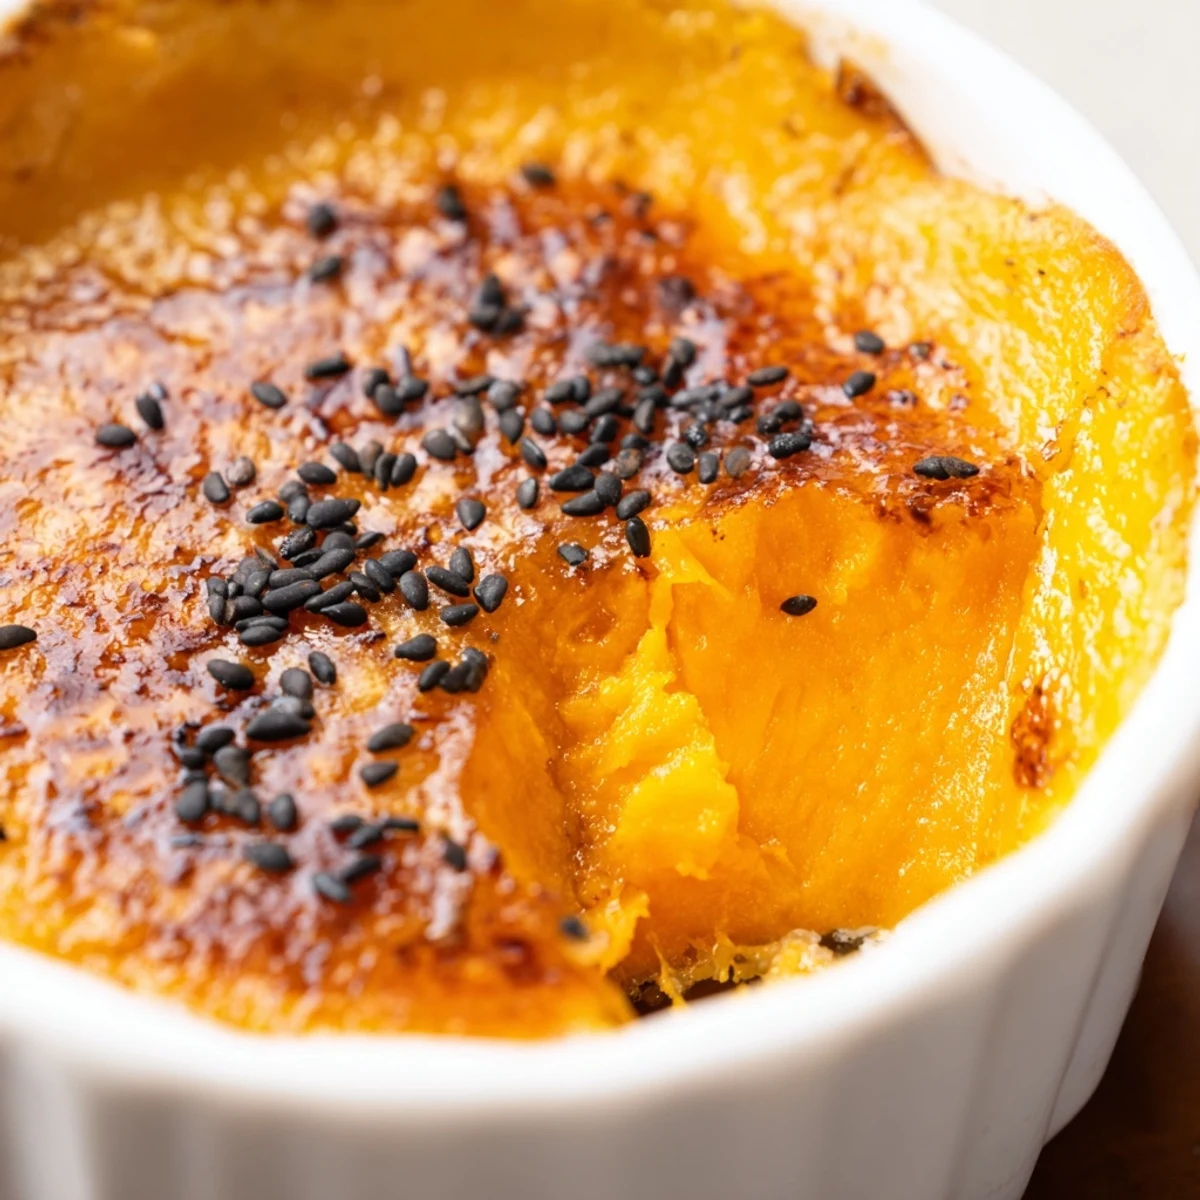
A kitchen torch gives you so much more control than broiling, and honestly it's just fun to use. Hold the torch about two inches from the surface and keep it moving in circles until the sugar melts and turns amber. You want an even, deep golden color for that signature crackle—if some spots are lighter, the texture won't be as satisfying.
Serving Suggestions
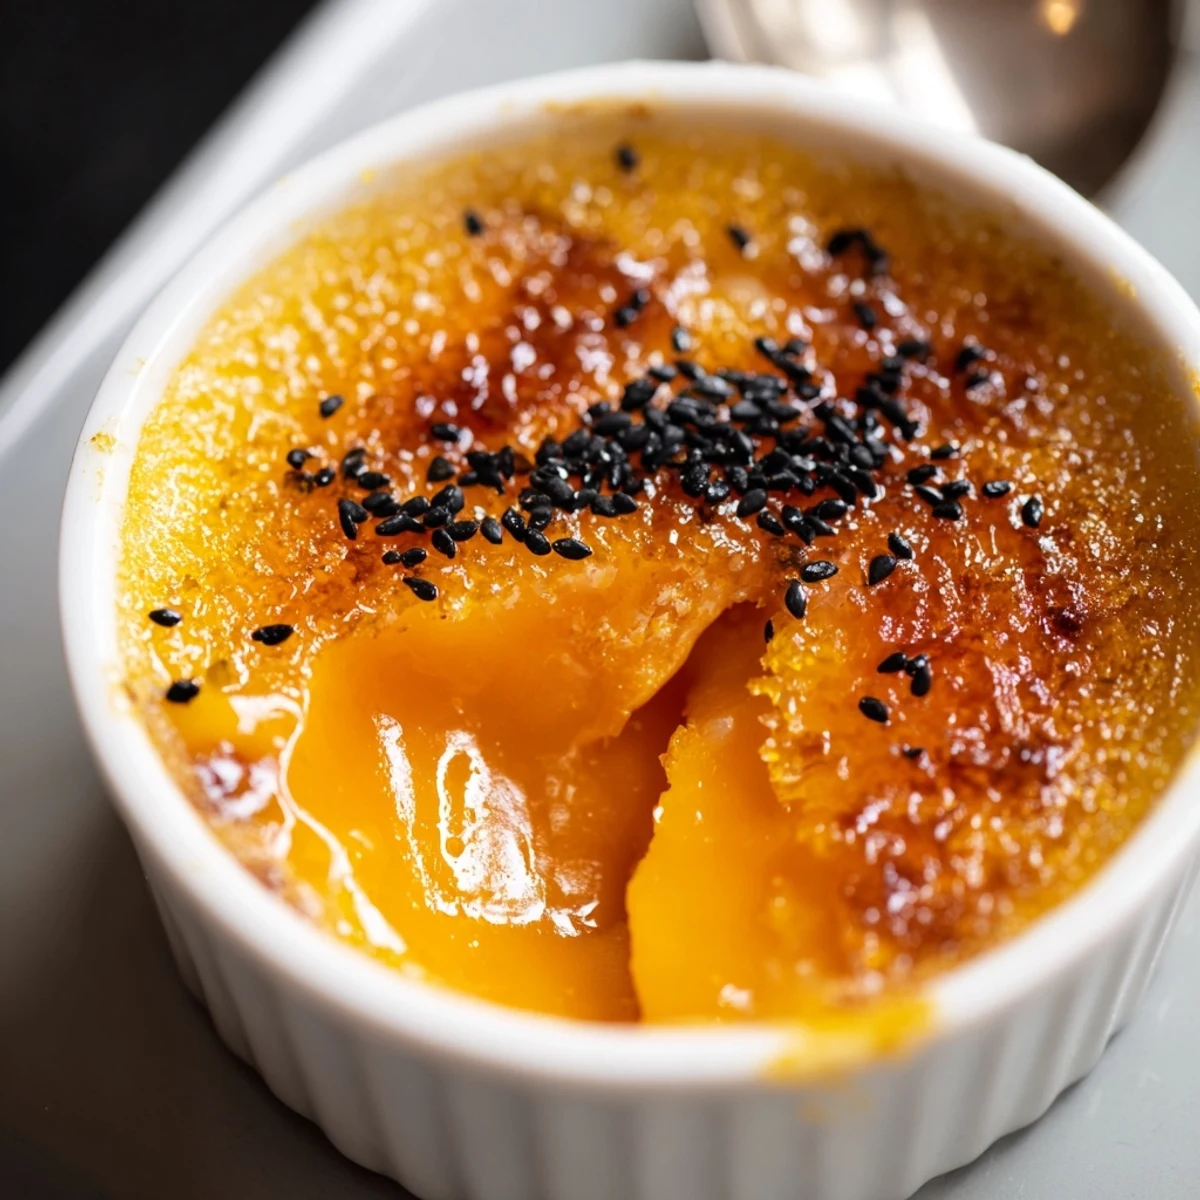
A sprinkle of black sesame seeds adds the most beautiful contrast against that pale custard and golden top. I've also topped it with candied sweet potato bits when feeling fancy. The earthiness pairs surprisingly well with a cup of green tea or a bright espresso to cut through all that richness.
- Don't skip the cooling step before refrigerating, or condensation will form on your custard
- If you don't have a torch, your oven broiler works in a pinch but watch it like a hawk
- These are best within 24 hours—after that the sugar starts to soften and lose its crunch
 Pin It
 There's something deeply satisfying about cracking through that caramelized surface into the silky custard beneath. It's become one of those desserts I find myself craving on quiet Sunday evenings.
Recipe FAQs
- → What makes Japanese sweet potato different from regular varieties?
-
Japanese sweet potatoes (often called satsumaimo) have naturally sweet, nutty flavor with a creamier, denser texture than orange-fleshed varieties. Their subtle earthiness pairs beautifully with rich custard bases, adding depth without overpowering delicate flavors.
- → Can I make this ahead of time?
-
Absolutely—the custards actually benefit from resting. Prepare and bake them up to 2 days ahead, refrigerate covered, then add the caramelized sugar topping just before serving. The custard needs at least 2 hours to chill properly for the best texture.
- → Do I need a kitchen torch for the caramelized top?
-
While a kitchen torch creates the most consistent results and signature glassy crackle, you can use your oven broiler. Place ramekins on a upper rack and broil for 1-2 minutes, watching closely as sugar can burn quickly. The torch method gives more control.
- → Why is straining the custard mixture important?
-
Straining through a fine mesh sieve removes any sweet potato fibers or bits of cooked egg, ensuring an impeccably smooth, silky custard. This step is crucial for achieving the luxurious, velvety texture that makes this dessert so special.
- → Can I adapt this for dietary restrictions?
-
Yes—substitute coconut cream for heavy cream to make it dairy-free, keeping in mind this will slightly alter the flavor profile. The dessert is naturally gluten-free as written. For a lighter version, you can reduce cream and increase milk proportionally.
- → How do I know when the custard is properly baked?
-
The custards are done when the edges are set but the center still jiggles slightly like gelatin when gently shaken—this residual heat will finish the cooking. Overbaking leads to a rubbery, curdled texture rather than the desired silky consistency.